NodeMCU : Getting started with ESP8266

In this post I will show you how to flash your ESP-01 and upload a NodeMCU firmware. In order to do that we will need to setup our development kit.
ESP8266 ESP-01 is a $2 Wifi module, a Microcontroller and a chip with full TCP/IP stack. This hardware is quite old now, but still useful if you want to create some small automation projects.
NodeMCU is an open-source firmware that helps to update your LUA code on your ESP8266. It also embedded a lot of functionalities : MQTT, DHT, PWM, TELNET, GPIO, etc.
1. Requirements
You can buy the following items on Aliexpress :
- ESP-01 ESP8266 [Aliexpress link]
- Power Supply - MB102 [Aliexpress link]
- FTDI FT232RL USB to TTL Serial [Aliexpress link]
- Male to Male jumpers [Aliexpress link]
- Stackable Long Legs Female Header [Aliexpress link]
2. Let's build our flasher kit
For this example , I will always use the same cable color.
2.1 ESP-01 - Pinout
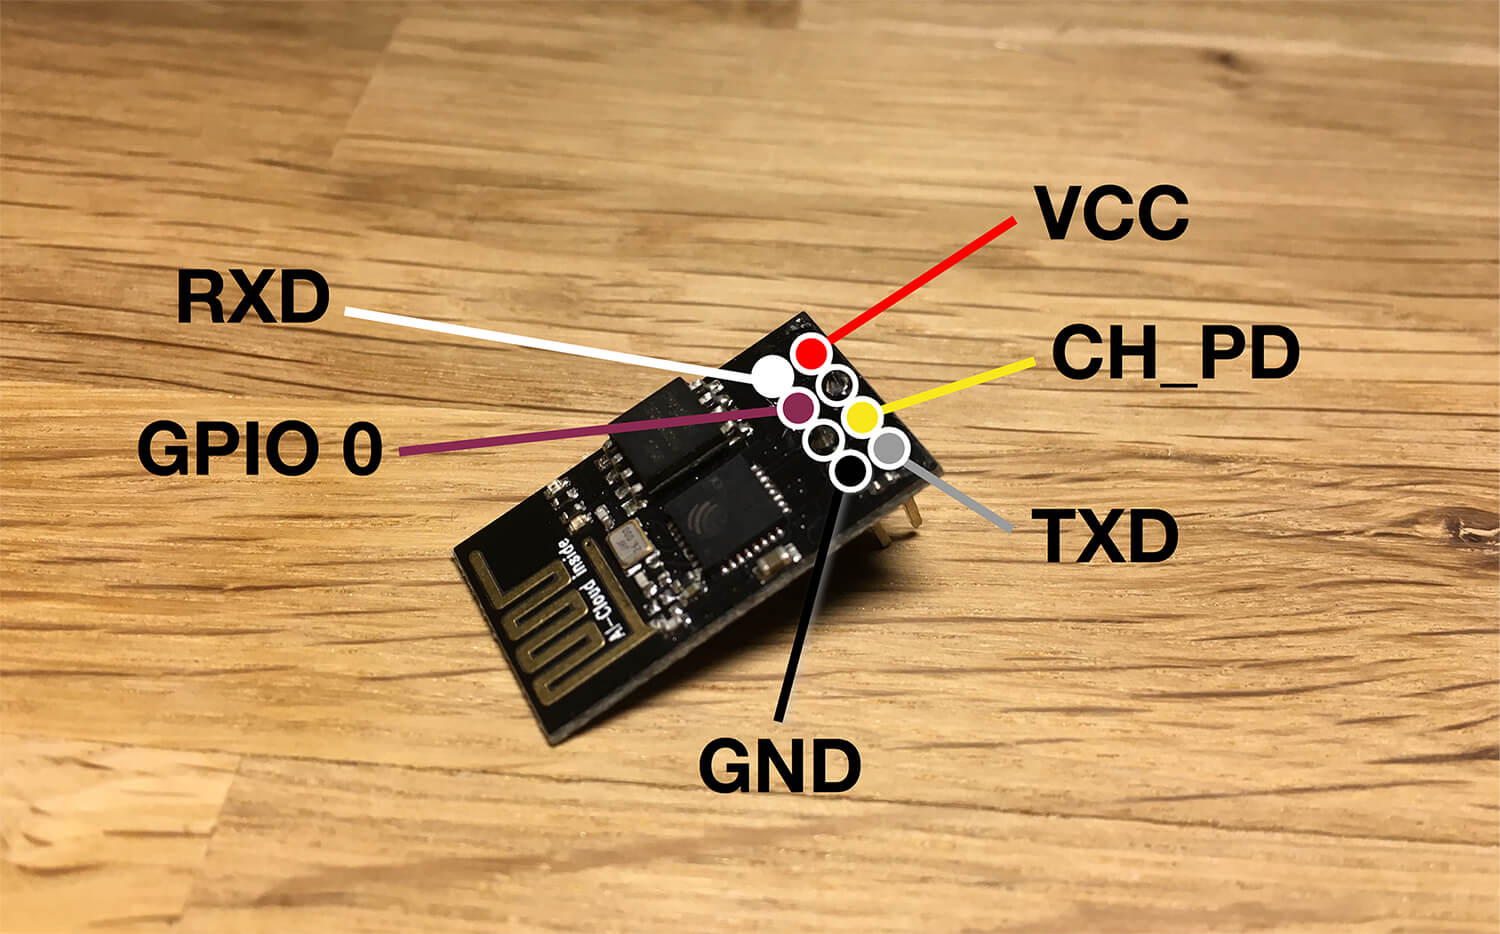
First thing to do is to connect each colored item on the above image with jumpers .
To connect the jumpers with the picture above, I am using two stackable female header. It's easier to plug and unplug your ESP-01 without rewiring everything.
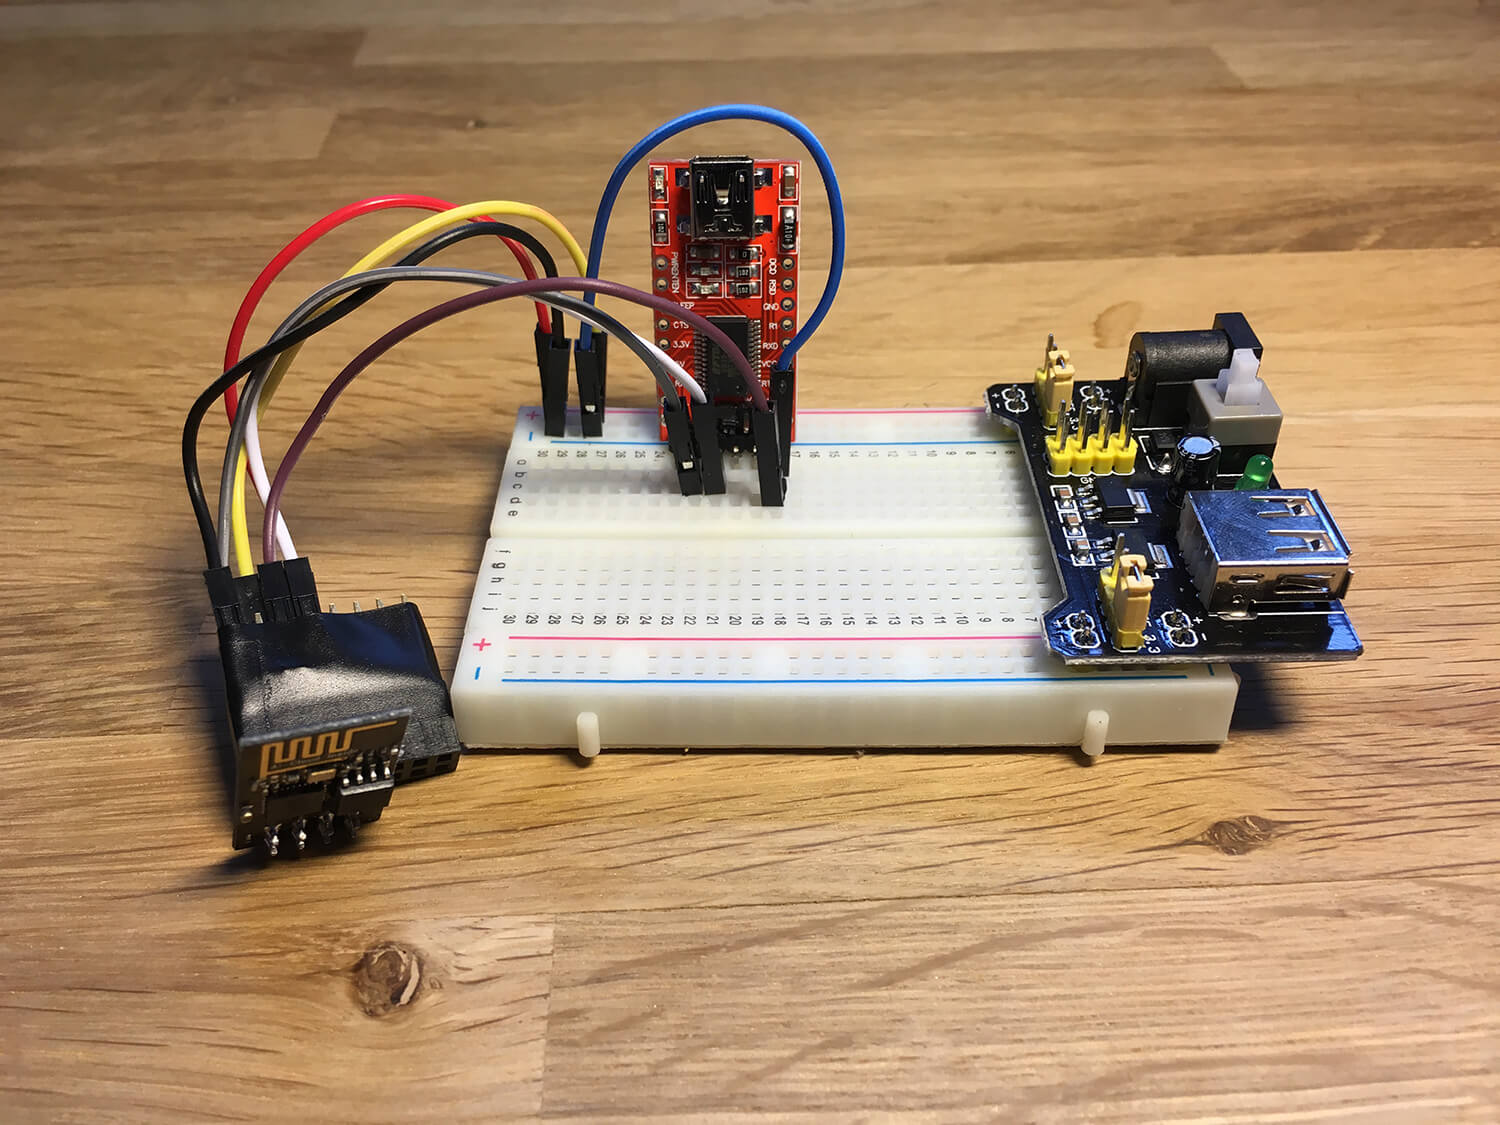
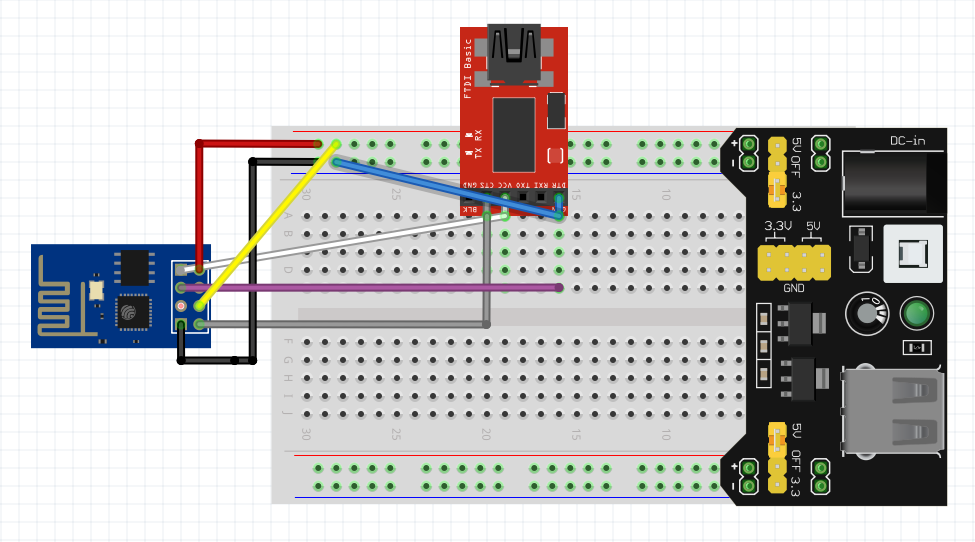
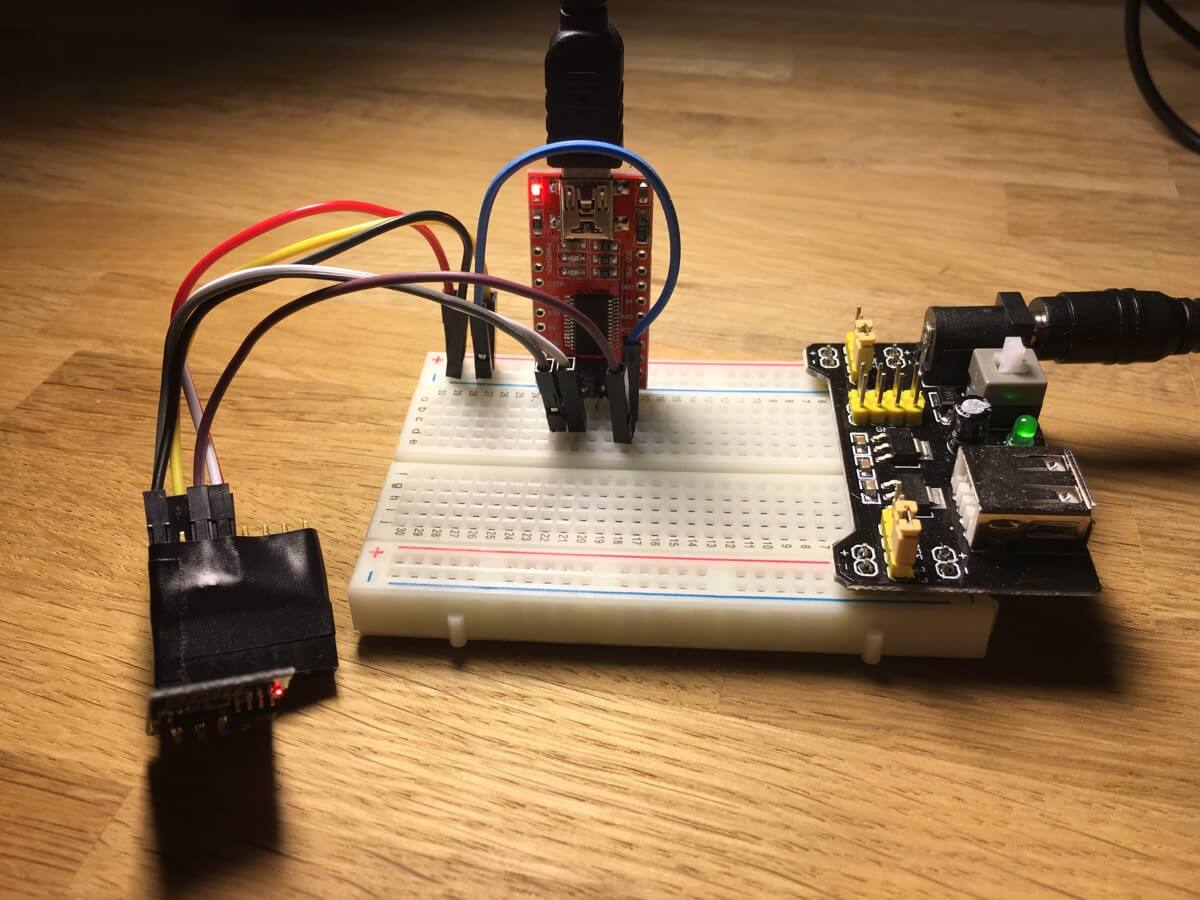
2.2 Breadboard
Plug your FT232RL in your breadboard and your power Supply as shown, then, wire your ESP-01 to the FT232RL.
To enable flash mode, we need to plug GPIO 0 to the GND. You won't need it after when we are going to upload our first program.
Do not forget to plug ESP-01 RXD output to FT232RL TXD input and ESP-01 TXD to FT232RL RXD!
2.3 Test it
If you click on your Power Supply white button, your ESP8266 red LED will light. It means you plug it correctly !
Good! You're now ready to flash it ;)
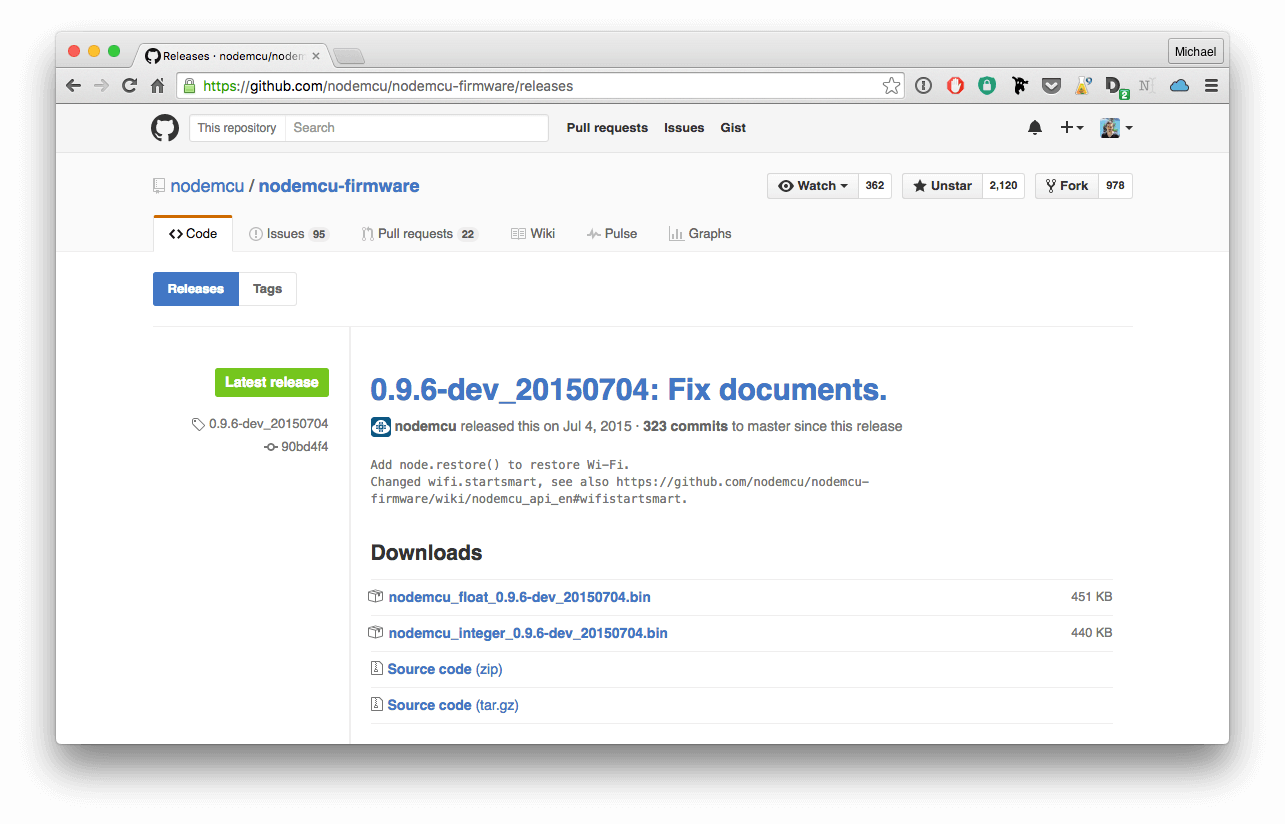
3. Download NodeMCU Firmware
On NodeMCU Github you can download a master or dev firmware. For this example, we are going to use the dev firmware.
4. ESPTool
For Mac OSX and Linux users, we will use ESPTool.
For Windows users : NodeMCU Flasher
4.1 Installation
pip install esptool
OR
You can do it manually and download the files from Github.
4.2 Flash it
You're now ready to flash it. Switch on your power supply and connect your FT232RL to your computer.
If you install ESPTool manually :
cd esptool
Then
sudo python2.7 esptool.py -p /dev/cu.usbserial-A900beEX write_flash 0x000000 nodemcu_builds_dev/nodemcu-dev-8-modules-2016-04-19-19-17-49-float.binExplanations:
- My device is connected to /dev/cu.usbserial-A900beEX. To see your FT232TL, you can easily "ls /dev/cu".
- Write address is 0x000000
- The binary I want to upload is nodemcu-dev-8-modules-2016-04-19-19-17-49-float.bin
If everything works as expected, no error will occur :
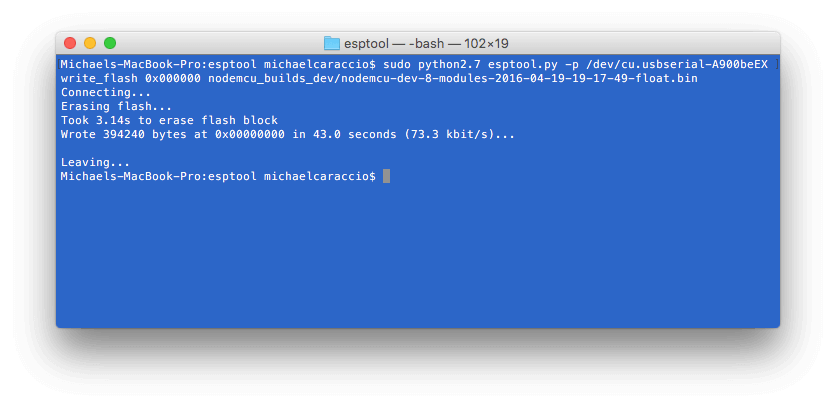
Congratulations! You're now ready to write your first program and upload it to your ESP8266.
Next time I'll show you how to write your first program in LUA and how to upload it. If you do not want to wait until my next post. You can use ESPlorer to upload your program.
Credit
ESP8266 Official website : http://www.esp8266.com
NodeMCU : http://nodemcu.com
ESPTool : https://github.com/themadinventor/esptool
ESP8266 : https://en.wikipedia.org/wiki/ESP8266
Member discussion